Ladies,
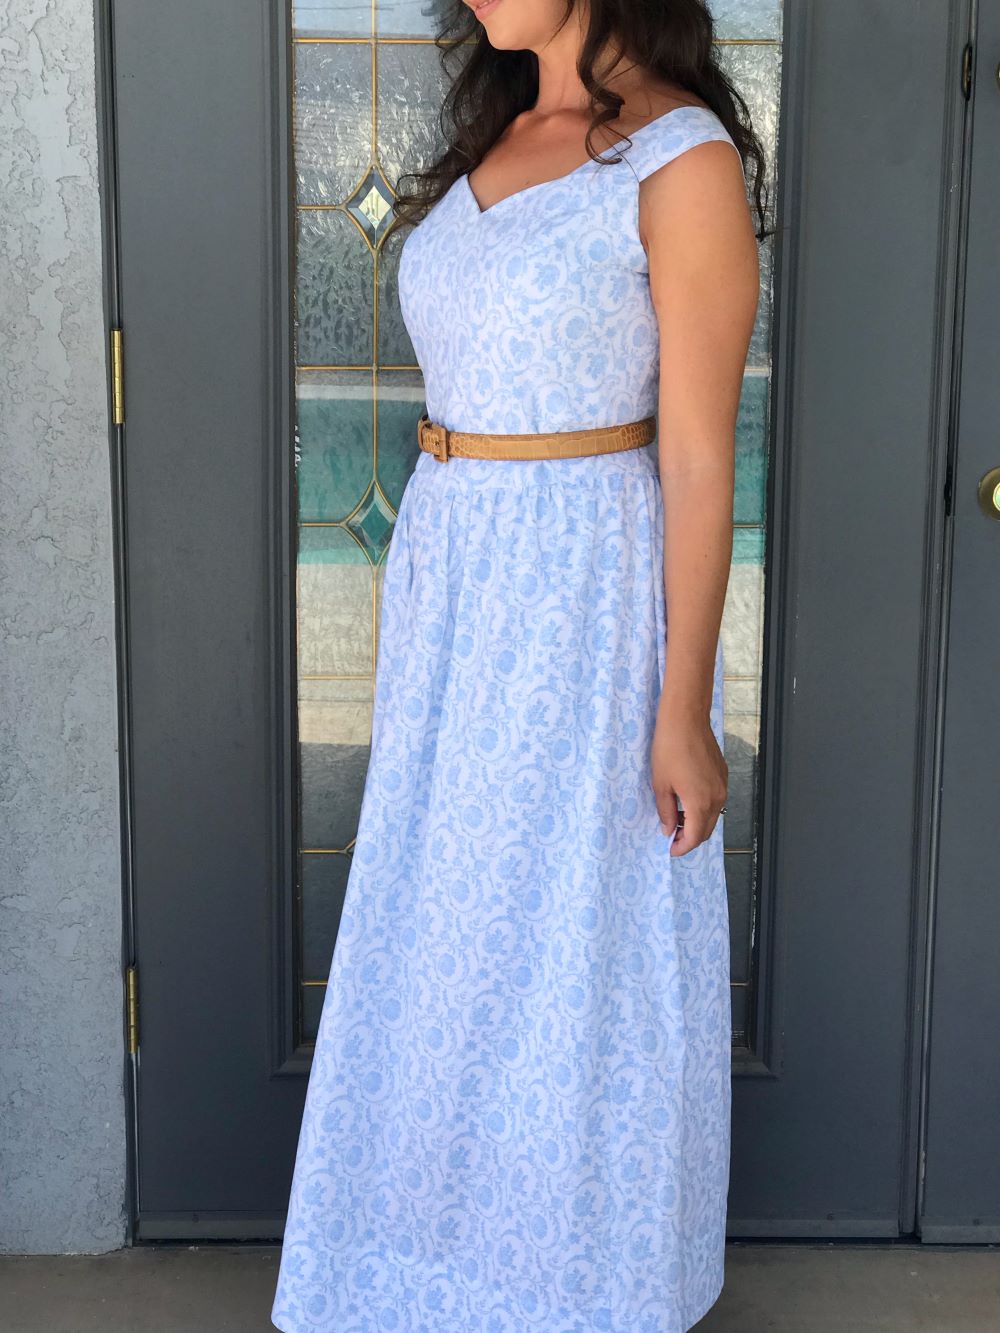
Here is my latest spring summer dress fit for a princess. This dress is a fast favorite of mine from the cotton fabric to the color and floral print, to the princess waist. What makes you gasp with excitement when you see it? If you are color shy, the spring/summer seasons are the perfect time to wear colors instead of neutrals for a change. Let your feminine style instinct guide you. In a world of dull and drab office looking women’s clothing, revive your daily dress by embracing color, pretty prints and things that would look perfect for walking in a garden in the glow of the sunlight. This Basque waist, or “princess waist” style is a treat to wear from a bygone era of beauty. In the right fabric, you will feel as relaxed as you are refined.


Mccalls 8209
My measurements for reference: 36 Bust – 29 Waist – 38 Hips
Size Used: 10 Bodice – Graded to 12 in the bust – 12 Skirt
Size notes: Size 12 fit in the bust and hips (the largest parts of me) and size 10 fit everywhere else in the bodice, then I did my typical fitting adjustments to tailor in the waist during fitting.
Seam allowance changes: No Changes.
Seam allowance not changed: N/A

Fit Problems: I am a petite, meaning my vertical measurements are shorter than a person over 5’4″ so my fit problems have to do mostly with making patterns petite sizing. When I attached the straps, I pulled up the entire bodice to where it hit me in the correct place to fully cover the bra on my back and sat high enough on my chest. This pulled the armpit too high into my underarm. I need the bodice to sit higher because it fit the best that high everywhere except the underarm. So, I did a post completion alteration to lower the under arm. I could have done two things to remedy this: what I did, which was pull up the entire bodice higher and lower the underarm to compensate. This worked because everything hit me in a good spot when I did this (the bust apex was a little too high, but it wasn’t too noticeable…). Pulling an entire bodice higher, raises everything together, which is not the way to adjust fit. But I wanted to see if this pattern would fit me without a ton of petite adjustments. It did not. Well, alright then.
Anyway, this gathered skirt is not sitting high on my waist at all, it is lower and the belt is at my true waist. It looks good here, somewhat “low waisted” but it would also look pretty higher too. It just depends on what look I want it to be. In this method that I did, (it is not a “method” at all, I was just sewing this pattern for the first time as a real dress not a practice one), I just pulled the whole bodice up & lowered the underarm. This worked fine, but it is not how I will sew it again. The better method to fit this bodice for petite is to go back to the pattern and add height to the back and front bodice pieces to make it that high without raising the entire bodice and making the underarm too tight. Then I would raise the waist at the waistline on the pattern piece, not raise it by pulling the entire bodice higher. Fitting issues are avoidable by sewing a practice garment first, which I did not because I preferred to adjust the dress as I went. Going forward, I will make these fit adjustments by reflecting the changes in the pattern pieces so there will be no post alterations.

Fit Adjustments: During the try-on phase once the dress was sewn, I tried it on inside out and pinned along the princess seams where I needed to take out excess fabric in the waist. This is a typical fit adjustment for me on all of my dresses since I am an hourglass shape. Before I installed the zipper, I also pinned out excess fabric along the center back seam (accounting for, and leaving in, the seam allowance). I also shortened the skirt by 4 1/2″ to my desired length of the lowest point of my ankle.
What worked without fit adjustment: The bust and hips fit in size 12.
Design Adjustments: I did not use the pattern’s thin strap for the shoulders, I drafted my own thicker strap to be 2″ wide.

Then I placed the strap on the bodice as it best hung on my particular shape to stay in place, not where they say to place the strap. This resulted in a strap sewn at an outward angle on the front, which added a beautiful style to the neckline. Then the straps were sewn further inward on the back which kept them up and not falling off my sloping shoulders. The bodice edge shape was changed where the straps were installed on the back. On the back there was a peak that I rounded out.

Lastly, the pattern calls for a 5/8″ narrow hem, but I made a wide hem facing to finish the hem. Taking the 4.5″ pattern piece that was removed to shorten the skirt pattern piece, that became my pattern piece for a hem facing to create a wide hem. This results in a higher quality looking hem and one that has more structure and retains a wide and flouncy shape.
How many times sewn this pattern: 1
Describe each creation: This first dress is made from a 100% cotton fabric from Hobby Lobby. It is a white background with a light but vibrant blue color in a scrolly floral vine design. This pattern has the bodice fully lined, but I also added a skirt lining to make the dress fully opaque.

What I love about this dress: This dress has a classic “princess waist”, called a “Basque waist” that dips down in the front, which is a longtime favorite feature of mine. The skirt has a nice amount of gathering at the waist, but it is not overly gathered resulting in a lot of poof if that is a concern for you. Another thing I like about this dress is my wider straps for a sun dress that fully covers bra straps and lends more beauty to the shape of the neckline.

Pattern Instruction likes or dislikes: The instructions were clear to me until I got to the install of the strap, I had to read that a few times to understand what to do. Then I ended up doing my own strap design but how they say to install it is still valid. It is an enclosed strap in the two bodice pieces.
What I dislike about this pattern: I would not be able to use the sleeves as designed for this pattern because they would never stay up on my sloping shoulders. So I would have to install an actual armcye that sits on top of my shoulder and then attach the sleeve to that. I wish they had drafted this pattern to have a view with a fully enclosed bodice over the shoulders for this reason. I will have to design my own version for this since that looks better on me and I might want to sew this with that pretty poofy sleeve.

Difficulty Level: Not difficult for an intermediate beginner as they have you sew it. If you need to make wider straps that is not a difficult change. This might not be the best dress to do a gathered skirt for the first time because it does have that dip in the front. But once you have practiced a gathered skirt on something else, this really is no different.
Most Challenging Part: As with most patterns, the straps/sleeves seem to take the most time.
Would I sew it again: Yes, and I want to make this with a different upper bodice design with a fully enclosed armscye to be worn sleeveless or with sleeves. I would also like to sew this in a rayon challis that has a drapey flowy look.

Happy sewing!
WHATEVERLOVELY.COM
CHRISTIAN LIVING – FASHION – HOME
Leave a Reply